August means time for Holiday quilting! Two weeks ago I completed the "What did you call me?" Witch Appliqué Wall Hanging. This weekend I decided to take a go at Frosty Jolly a pattern by Happy Hollow Designs. I actually picked it up last year during a Black Bag Saturday, along with the about 15 fat quarters it requires, but being pregnant and tired I just never got around to completing it.
My quilting happens when C naps, so today's project time was from noon to 2pm. I did get a jump start at 6am while playing in C's room, he played with some toys while I read the pattern and noted the count of how many of each color of squares would be needed.
For this pattern the squares are 1 7/8th inch each, and there are about 300 squares! Don't worry it's an easy assembly line process for cutting and for sewing. Fusible grid paper makes this project manageable and beautiful!
To start the project I began cutting out all of my squares. I am very lucky to have just recently purchased a fiskar 6" x 24" slide cutter. This ruler and cutter combined is able to cut through up to eight sheets of fabric at a time.
Since I needed to make 1 7/8 inch squares I took my fat quarters and cut them in piles by color. Each fat quarter I cut two rows from the 21 inch long side. This enabled me to get a bout 10 perfect 1 7/8 inch squares from each row.

After getting all my squares cut out, I took time to change piece my half square triangles which are the only other shapes and the pattern. There were three orange/ white, seven black/white, 20 purple/green.

After these were chain pieced I cut the half off that was not needed, then took them to the ironing board to be pressed. As I have learned From the great Jenny down of Missouri star quilt company, I pressed all my pieces to the dark. This ensures any white pieces will not have the dark fabric coming through on the back of the seam.


Once my half square triangles were complete I begin the process of setting up my fusible grid paper to build the project on.

The instructions call for the fusible grid to be done in two pieces, one being the snowman's hat, the other being the snowman's face and earmuffs. I decided to start on the face and earmuffs first since it is the larger piece.
For the layout of the face and earmuffs I chose to begin by marking up my fusible grid paper. The version I have by Pellon has gold grid lines which to me is a bit hard to see. So I took my pink Frixion highlighter which disappears when heated and I sketched out the center grid and the earmuffs and locations of the HST's.

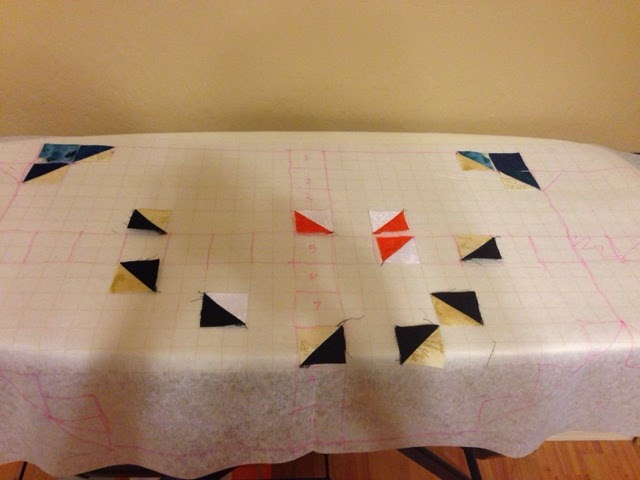

You may be wondering, "Katie, why are you not placing the right next to each other, there are little gaps." Have no fear, it's supposed to be that way! Remember I cut squares 1 7/8th inches? Well that 1/7th of an inch missing is the gap you see and once we sew the fusible grid those gaps will disappear. Here's a sneak preview:


With all the pieces laid out, it is time to iron them to the fusible grid paper!

The next step is ironing on top of your pressing Mat to secure the squares to the fusible grid paper. I am lucky enough to have an Oliso iTouch iron, so when I place my iron on my ironing board if my hand is not on it it has little feet that pop up so that nothing can get scorched.


The next step requires The excess feasible grid to be cut away. You can see below that I cut off every extra piece of feasible grid including the sides of the corners.

Here is what the first line sewn looks like. Nothing too fancy, a quarter-inch stitch right next to the grid line.

When you open up the line you can see that there is no longer a gap between the two rows that have the same line.


Since this square didn't get sewn into the same line, as you will see in the picture below I removed the stitches with my seem ripper and then place the square back in the right spot and sewed the gap shut. Which fixed the issue.


No comments:
Post a Comment