Showing posts with label binding. Show all posts

Tuesday, December 4, 2012

Finished Project: Christmas Tree Skirt!


 Tuesdays I work late so I always spend the first hour of the day doing laundry and watching the latest episode of the amazing race. Once I had both those tasks in motion I got back to working on the tree skirt. I had my binding complete from last night, so the first order of business was to cut the opening in the tree skirt and then pin the binding so it could be attached.

Cutting the opening was a bit scary but instead of going circular like the video I chose a square opening. I think it looks nicer and I figured it'd be easier to bind.

As I shared a few days back in regard to binding, I'm about speed and efficiency so machine binding is all I'm currently interested in. I watched a great tutorial on Riley Blake Designs website on how to machine bind and decided to try their method. Instead of binding from on top and them matching the seams to the bottom, this method had me attaching the binding to the bottom and rolling it to the top and sewing from the top, where you could see what was and was not getting sewn. Way smart.

Let me tell you the cutout was literally the hardest part to bind. One because there was no excess batting to need to cover so you have some more fabric to bring over than you do else where and two because the corners were so short it was hard to miter them.

I got the whole skirt bottom binding attached then flipped it to the front to begin pinning so I could see it to the top. When I got to the cutout I decided it wasn't working, it just seemed like to much fabric so I got out the seam ripper and took it apart. Then I re-positioned and sewed it again, well I ended up sewing it the same way, but when I was done this time I got it to be more manageable and was able to pin it in a way I liked.

I finally went at sewing the top binding on and thankfully it almost completely turned out as I had anticipated! Woo! Especially because I was at this point 15 minutes before I needed to leave for work! I took it to the living room so I could lay it flat and take photos and only found two areas where I'll need to go back and rip the seam and resew but thankfully thy were small areas!!

So happy to have this second project complete and cannot wait to use it on our tree!

*** UPDATE*** Now that I'm home from work I seam ripped the three areas that needed attention and resewed them, they look beautiful! I also now have the skirt under our tree (pictures below!)

Cutting the opening for the tree. Scary but manageable. 


Completed Skirt, I love the the middle closes on it's own so you don't have to tie it shut.

Completed Skirt, showing off the opening. 

Showing front and back fabrics. The backing fabric is cute so I might  reverse this every couple of days so I can enjoy both sides!


Completed Skirt looking at it head on. The opening is on the right side as the backing fabric and some of the Merry Christmas Fabrics on the front side are one directional.

The Reverse of the Tree Skirt!
Closeup of Cutout Binding

Closeup of Front and Back Binding


Completed Skirt Serving Its Purpose! 

Monday, December 3, 2012

Matching fabrics and preparing binding

Today during lunch my goal was to find a backing fabric, border fabric and batting for the tree skirt that is underway. I took two of my completed coasters with me to Hobby Lobby to help me in matching the process. For the backing and binding I ended up choosing a red fabric with white polka dots, and for the backing a white fabric with green and red Christmas trees. For the batting I choose a type called natural and warm. For the batting I decided to buy extra for fear that I'd calculated my finished piece size incorrectly. As for the binding and border I knew based on the Missouri Quilt video I needed at least 15 inches for the border and so I believe I decided on 25 inches worth to ensure I had the right amount of it for the border and binding.

When I got home I cut out my border pieces and attached them as instructed in the video. The method they used to have all the borders be straight edges was a blessing! So easy. Next I had to take the backing fabric, batting and tree skirt and pin them together for quilting.

Last week my fantastic quilting teacher had shown me how to use a large piece of cardboard (mine was left over from a large piece of furniture we'd purchased) to secure your backing fabric right side down with pins to ensure it was as tight as possible. After getting the backing secured I needed to lay down the batting. The type I bought was having static cling to everything it touched so the hubby helped me lay it out on the backing fabric. Next we laid out the skirt top an I was able to begin pinning. I pinned the outer border and then squares within. I saw one video in my research that says you should have pins one fist apart from each-other, but there was no way I was going to spend the time putting a pin in all 64 squares. I think I had 24 all together.

After pinning I cut the excess patting and binding down to .5 inches from the edge of the border. This helped a lot when I started quilting. For my Table Runner I had all the excess batting still attached which made it hard to maneuver in the sewing machine. I quilted four areas using stitch 29 again (I think it's my favorite). I used silver rayon thread and did the stitching at speed two. Another great tip my quilting instructor taught me was with the Rayon strings the need room to move and if you put them where your normal spool goes they'll tighten up and potentially your string will break mid sew. So I did what she showed me, I got a coffee cup from the kitchen put the spool in it and in wound a little to release the tension and then set it up in my upper threader. This worked great! I was quilted the border, and 3 inside block sets as you'll see in the photos. I figured this would give good definition on the skirt top and bottom.

After all the quilting was done I cut my binding. I had five strips of about 40 inches each, I sewed the ends together and ironed them in half and finally called it a night.

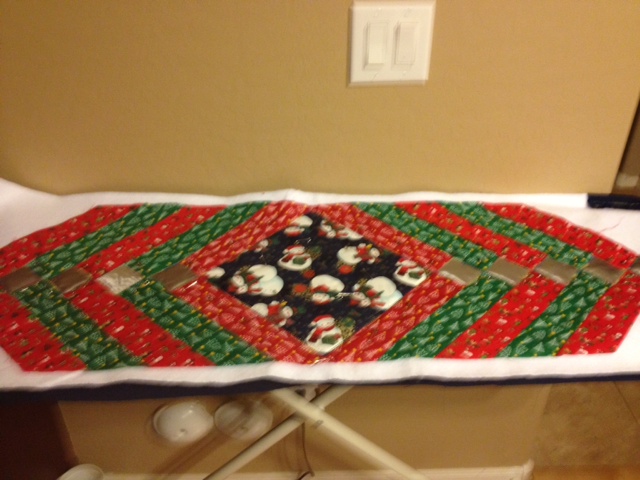
Border sewed on, ready to meet the backing fabric and batting.


Close up of Skirt Top prior to pinning


Cardboard where I laid out and pinned all three pieces and then cut to size.
Backing Fabric
All three layers pinned together ready to quilt.
Closeup of the Top Stitching in Silver Rayon Thread
Closeup of backing, to show fabric as well as under stitching, if you look closely you'll see the 4 areas that were quilted.

Friday, November 30, 2012

Quick and Easy

Last night I started attempted to take my original log cabin block (see below) and turn it into a hot pad. I cut the backing and batting, pinned the layers together, quilted the areas desired, and then cut and ironed the binding. Pretty good for a quick turn around if you ask me! 

 Below are pictures of the project in action!

Original Log Cabin Block
During Quilting/Binding Process. Added the batting/backing, and pins, this point I had completed the machine quilting. I did the stitch in the ditch which turned out pretty well! 

Quilted Edges using Stitch 23

Quilted Edges Closeup, White thread for the Navy, and Multi-Color for the Red/Green
 All that I had to do today when I arrive home was finish pinning the binding and then sew it on. Even though I knew machine binding is not the cleanest way to go I decided to attempt it again. This time I knew going in that I would want to cut my excess binding and backing down to just a 1/4 inch to ensure I'd have enough room to fold the binding from front to back properly. I rewatched the Missouri Quilts video on how to bind a quilt and stole their trick for making the edges look nice. Funny thing is I had no problem pinning and sewing it on two corners but the other two corners made me totally confused and I eventually got them pinned but when I sew them I accidentally sewed them shut and had to use my seam ripper to release them in the end. Thankfully you can't see those mistakes in the finished product but crazy how you can easily do something and then the next time you try it you can totally mess it up. 

Ta Da: The Finished Hot Pad


If you're wondering why none of my photos of table toppers or hot pads are on my table, its because the table has been taken over by fabric, sewing machine, cutting mat, and so much more! 

Completed Front Side and Completed Back Side of Hot Pad

Closeup of Binding, Quilting, and Top/Back
Matching Hot Pad and Table Runner! 

After finishing these projects I decided to just make a fun block that could potentially be used later or if not I figured maybe it could be a hot pad. Using the Peacock Fabric and the 3 types of pink/mauve that I had I took the Bridle block from week one and made it my own. Here is the result:

Instead of having 4 sets of the outer most corners in the middle nested together I decided to just emphasize the pretty peacock fabric and put it in the middle as an accent.

Thursday, November 29, 2012

Completing the Table Runner

I really don't enjoy unfinished works, so as soon as I got home from work I got to working on my binding. After rewatching the video from Ehow.com on Machine Binding, I went to work pinning my binding to the table topper. Pinning the binding was the easy part. Once I had it pinned down I had to attempt to sew it on perfectly with the 1/4 inch seam allowance, the pins really helped me get this correct. There is only one part that you'll find on the finished table topper where I couldn't get the binding in the right place on the top side (Which was annoying but hey it's my first project).

After I got the binding attached by machine, I cut down the excess batting and backing to a half inch, as the youtube video stated. I had to trim it down a bit more in a few places because of a few small inconsistencies in my 1/4 inch seam but overall this was pretty easy with the rotary cutter. 

Once I had it cut down I unpinned the binding and started folding it over to the back side. The goal is to have the binding tuck into the back side so that if you go over your first binding stitch it will attach the back binding in the same place and look almost seamless. In about 45% of the quilt I would say this happened... the other parts--- well let's just say thank goodness this isn't a reversible table topper. Although there were some parts where it didn't go in as well as I would have liked it looks very nice on the top. If I were to do it over I might consider hand stitching as you have more control but this was WAY fast and it made me happy to finally have a finished piece of work! 

Here are photos of the finished product:


Finished Product!


Close up of Backing, binding, and quilt top. 


Split View of Left and Right Side


Completed back and binding 
Now that this project is complete I'm going to go back and make a hot pad out of my 10 inch log cabin block I made. I'll let you know how it goes tomorrow! 


Original Log Cabin

Wednesday, November 28, 2012

Table Runner Project Part Two

I knew the table runner project was going to require some assistance, so I reached out to my great quilting 101 teacher to see about going to her house for help in adding the batting/backing/and binding to my table runner. 

I was able to join her and another quilter (who was getting help designing a really neat animal themed quilt for her son) after work today. I set up my sewing machine and took out the table runner top, both ladies were jealous that my fabrics thus far had all been from Goodwill :) 

To get started on adding the backing and batting to the table runner I ironed my backing fabric, cut to the desired length and width with a bit extra on each side to make sure there is enough, and then laid it flat on a large piece of cardboard and pinned it down taunt. Next we laid out the batting, just a bit smaller piece than the backing, and then on top of that, Right Side up, we added the table topper. From here we pinned the outer most sides of the table topper to the other layers to get everything tight. Then we discussed what parts I wanted to "quilt". We decided since it was my first go at machine quilting I would outline each of the satin silver squares and the large snowman square in the middle. We pinned along the outsides of all of the silver squares to ensure the fabric wouldn't move to much while quilting.   Then my quilting instructor asked me about what type of thread I was planning on using... I said white most likely because the only other color I have right now is navy blue. She laughed and brought back a really fun rayon thread that was multiple colors and quite shiny. We tested it along with a few of the fancy stitches on my machine on a test "sandwich" (fabric, batting,fabric). I decided to go with selection 51 on my machine for the stitch. After getting half way through quilting the table topper it was time for me to head back home. 

When I got home I finished quilting the table topper and then spent about 30 minutes surfing the internet trying to find out how to add the binding to the quilt-- as we hadn't got that far before I left class. Eventually I found two videos, one from Ehow.com and another from the wonderful Missouri Quilt Co. . While the quilt company gave me the best instructions for determining the length needed for my binding, the ehow gave instruction on how to machine finish-- which is what I wanted to do as I'm not super patient sewing and it's been forever since I've sewn by hand. 

I used the info from Missouri's video to cut out my binding and iron it out so it would be ready for me when I got home from work on Thursday. 

Here are the photos of where my table topper ended today: 

View of table topper pinned to all three layers (sorry for poor photo quality) 
Stitching on the back, could have done navy but figured might as well have some pattern. 

Closeup so you can see what stitch 51 looks like :)

Multi colored thread and close up of pinning pattern.

Binding for tomorrow!