Showing posts with label Goodwill. Show all posts

Wednesday, November 28, 2012

Table Runner Project Part Two

I knew the table runner project was going to require some assistance, so I reached out to my great quilting 101 teacher to see about going to her house for help in adding the batting/backing/and binding to my table runner. 

I was able to join her and another quilter (who was getting help designing a really neat animal themed quilt for her son) after work today. I set up my sewing machine and took out the table runner top, both ladies were jealous that my fabrics thus far had all been from Goodwill :) 

To get started on adding the backing and batting to the table runner I ironed my backing fabric, cut to the desired length and width with a bit extra on each side to make sure there is enough, and then laid it flat on a large piece of cardboard and pinned it down taunt. Next we laid out the batting, just a bit smaller piece than the backing, and then on top of that, Right Side up, we added the table topper. From here we pinned the outer most sides of the table topper to the other layers to get everything tight. Then we discussed what parts I wanted to "quilt". We decided since it was my first go at machine quilting I would outline each of the satin silver squares and the large snowman square in the middle. We pinned along the outsides of all of the silver squares to ensure the fabric wouldn't move to much while quilting.   Then my quilting instructor asked me about what type of thread I was planning on using... I said white most likely because the only other color I have right now is navy blue. She laughed and brought back a really fun rayon thread that was multiple colors and quite shiny. We tested it along with a few of the fancy stitches on my machine on a test "sandwich" (fabric, batting,fabric). I decided to go with selection 51 on my machine for the stitch. After getting half way through quilting the table topper it was time for me to head back home. 

When I got home I finished quilting the table topper and then spent about 30 minutes surfing the internet trying to find out how to add the binding to the quilt-- as we hadn't got that far before I left class. Eventually I found two videos, one from Ehow.com and another from the wonderful Missouri Quilt Co. . While the quilt company gave me the best instructions for determining the length needed for my binding, the ehow gave instruction on how to machine finish-- which is what I wanted to do as I'm not super patient sewing and it's been forever since I've sewn by hand. 

I used the info from Missouri's video to cut out my binding and iron it out so it would be ready for me when I got home from work on Thursday. 

Here are the photos of where my table topper ended today: 

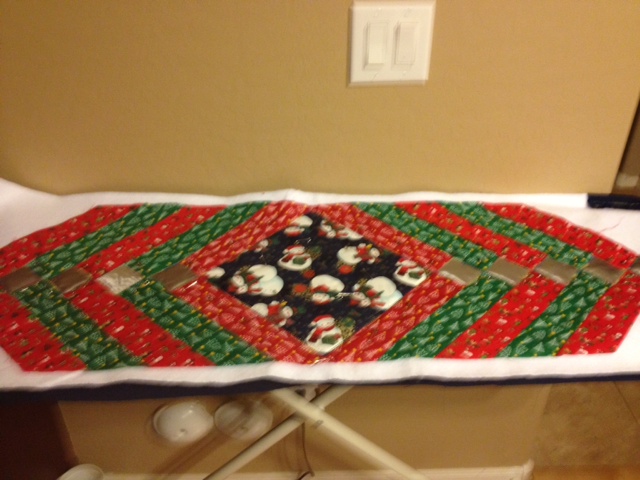
View of table topper pinned to all three layers (sorry for poor photo quality) 
Stitching on the back, could have done navy but figured might as well have some pattern. 

Closeup so you can see what stitch 51 looks like :)

Multi colored thread and close up of pinning pattern.

Binding for tomorrow!


Sunday, November 25, 2012

Who needs Black Friday when you have Goodwill!

Today I returned from Northern Arizona back to my house and had a few hours to work on quilting and getting laundry done. Before I decided what I wanted to work on I decided I would check out Goodwill to see if they had more fabric in. When I was there on Tuesday, the cashier said they get fabric and patterns all the time... and surely enough that was the truth! 

When I got to the area they sell fabric in there were many bags of mismatched fabrics. There are a few down falls with shopping this way: 1.) You can't touch the fabric 2.) You don't know how much of each fabric you're getting and 3.) If it's an ugly fabric they have a lot of they put it in multiple bags hoping to get rid of it! The good thing is, the positives outweigh the negatives. I picked up six bags of fabric ranging in price from 69 cents to 99 cents and when I rang up I only paid $4.84 (some bags were on sale!). Below is a picture of all the fabrics I got: 


Starting from Upper Left: Purple Hat Society Fabric, Paisley Flowers, Mauve, Light Pink, Red with Colorful Hearts (A LOT of this), Yellow and White Moon and Stars, 1/2 a purple bandanna,  about 20 10"x10" silver squares that once ironed and trimmed are beautiful. From Bottom Left: Small Blue/White Flower print, Medium Blue/Green Flower Print, Light Blue Solid, Pink Solid, and then two dark blue solids and a silver solid. (Dark blues and silvers are not cotton so I won't be using, but I'll get them to someone who can use them.)

After sorting and ironing this lot of fabric I decided to give the Simplified Lover's Knot pattern from the old quilting book a shot. The directions were not the most simple to me because they gave you the information on how to make the blocks as if you were making an entire quilt. So instead of saying for block one you need two strips of this and one of this, it told me I needed 16 strips of this and 24 of another. After doing some math I was able to break down the pattern and put it together. The nice thing about this is it is like the Split Rail or the 9 Square Block, you take two fabrics and alternate the colors and sew together so you have a light, dark, light panel, and then a dark, light, dark panel. Once you have those done you just cut strips to size, match seams, and begin to sew again. 


Lover's Knot Block
As you can tell I used a very light blue and a semi-light blue for this block. The very light blue is pretty sheer so I may not use it again unless it's in small doses. Not everything ended up matching up and I think this is partly due to the fact that both fabrics like to stretch a little. Overall not my favorite, but would like to try again with different fabric because a completed quilt with this as all of the blocks would be lovely. 

After making this block I decided to practice sewing the 9 square patches again and matching corners so I cut up one of the silver 10 by 10 squares, and took some scrap peacock fabric  and some of the new bright pink to put the mini-blocks below together. Since the size was kind of weird I couldn't figure out how to put them all together where they would look good, so for now they're just 4 separate mini-blocks.


Tuesday, November 20, 2012

Setting Up For Quilting At Home

Quilting Day Two:

After finishing my quilting 101 class I knew that I'd need more fabric to practice with and to pick up the sewing machine from Costco. Since I work later in the day on Tuesdays I had a 2.25 hour time block before work where I could run around town picking up fabric and my sewing machine, and then see how far I could get at getting my quilting area at home set up. My wonderful husband agreed that the dining room would be a great place for me to set up for quilting since we don't use the room too often and it has a large table and plenty of light. 

So at 9:00 a.m. I set out to accomplish my task. I first went to Goodwill where I was able to pick up three bags of fabrics for a total cost of $2.97 :) (1 with three types of holiday fabric, 1 with some pastel and red/white fabric, and another with a large about of light blue fabric). Next I went to Savers where they sell fabric individually but it's usually at least a yard of fabric or more. There I got a great red Christmas print fabric, a beautiful pastel pink and orange fabric with birds for $2.50 total. By 9:40 I had made it to Costco, got gas in my car, and at 9:45 they started letting people in early. I had my sewing machine in my cart and was through the checkout line by 9:50am and left with a Diet Coke in my hand and a smile on my face!  

By 10:00 a.m. I had made it back to my house. As I mentioned before I knew that the Brother sewing machine was the one I would get so of course even before purchasing I had watched the informational set up video for the machine on YouTube. This was helpful because when I arrived home I knew I'd have 1 hour and 20 minutes before I needed to leave to work, and I realized the set up video was about 20 minutes long-- so that would mean I should be able to have the machine up and going pretty quickly and have time to run a few test stitches before needing to leave for work. 

Sure enough the machine was pretty easy to set up, just follow the video. **Note to all people who buy a sewing machine--- the machines do not come with spools of thread, you'll want to buy at least one before bringing yours home and trying to set it up or you'll be spending 20 minutes of your 1 hour and 20 minutes driving to the closes Albertson's to get thread so you can complete set up like I did** The only struggle I had in setting the machine up was the automatic threader for the upper thread. I felt like it would just not catch-- after watching the video on a ten-second repeat about 5 times I realized I just was releasing the lever to fast and it couldn't catch. Once I figured this out I go the upper and lower thread set. 

To practice sewing I just cut a few strips of fabric and ran lines through. I knew I'd need to figure out where my 1/4 inch marker was before I started to make any sort of quilting blocks. The machine I purchased came with 8 different feet... however the only one it didn't come with was the 1/4 inch quilting foot which I immediately purchased on Amazon for $12.00 and paid to have it shipped over night (I <3 Amazon Prime). Once I figured out the seam allowance issue I cut a few strips of fabric and made another 9 Square block, by the time it was complete I had to head out the door to get to work, but I was super happy to see that I retained my knowledge from the night before and the sewing machine didn't get the best of me. 

The Block on the left was made in the 101 class, the block on the right I made at home in about 15 minutes!